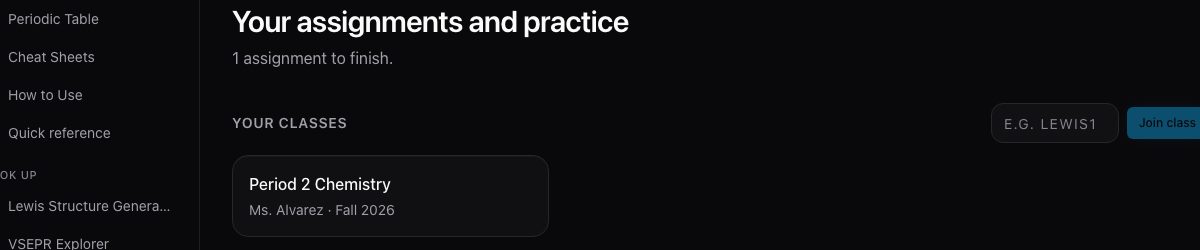
Your class and its assignments appear on your dashboard.
Before you start: A join code from your teacher.
1
Open your dashboard, type the join code into the box and press Join class.
The code is six characters, like LEWIS1. Lowercase is fine; it is capitalised for you.
You should seeThe class appears under Your classes, and its assignments under Assignments.
If it is differentIf the code is refused, read it back letter by letter. A class that has been archived no longer accepts new students.
The dashboard: the join-code box sits beside Your classes.View full size
Task 2
Do an assignment
Every problem answered and the assignment handed in.
Before you start: You have joined the class (see Join your class).
1
Press the assignment you want on your dashboard.
They are listed most urgent first: overdue, then by deadline, then the finished ones.
Assignments, most urgent first, with the due date and where you are in each.View full size
2
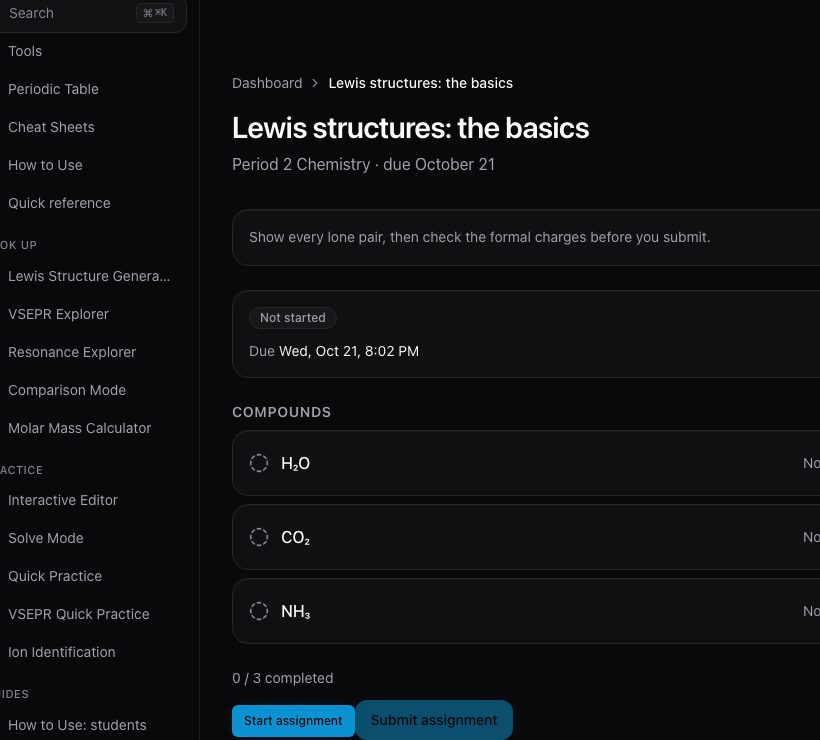
Read the assignment page before you start.
It shows the deadline, your teacher's instructions, every problem and whether you have answered it. The badge says where you are: Not started, In progress, Ready to submit, Submitted or Graded.
An assignment before you start: the deadline, the problems and Start assignment.View full size
3
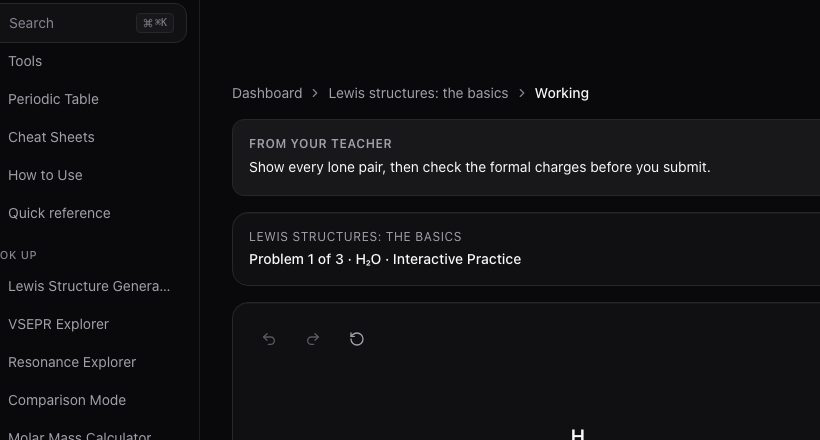
Press Start assignment (or Resume assignment) and read your teacher's instructions at the top.
They stay above the work while you answer. The label above each problem names the activity: a structure to draw, a guided solve, ions to name or a shape to analyse.
The work page: instructions first, then one problem at a time.View full size
4
Answer the problem, then press Check answer.
In the drawing activity you build the structure and press Check answer. In Quick Practice and Solve Mode you work one step at a time and the button says Record and continue.
You should seeA message says whether your answer was recorded and whether it is right. A wrong answer is recorded too, and you can rebuild and check again before you submit.
If it is differentIf it says it could not reach the server, your answer was not recorded. Check your connection and press the button again.
5
Leave and come back whenever you like.
Your structures are saved as you work, but only checking an answer marks a problem complete.
6
When every problem is answered, press Submit assignment.
The button is greyed out until then, though you can still reach it and it says what is missing. The server checks too. Submitting hands the work in for marking; it cannot be reopened.
If it is differentIf Submit assignment is greyed out, the page counts how many problems are completed. Open Resume assignment and finish the rest.
7
Wait for your teacher to mark it graded.
Until then it says Submitted, awaiting your teacher. After, it says Graded with your score, and shows what any late or attempt deductions cost and which problems they came from.
Task 3
Practise on your own
You have picked the practice that fits what you want to get better at.
1
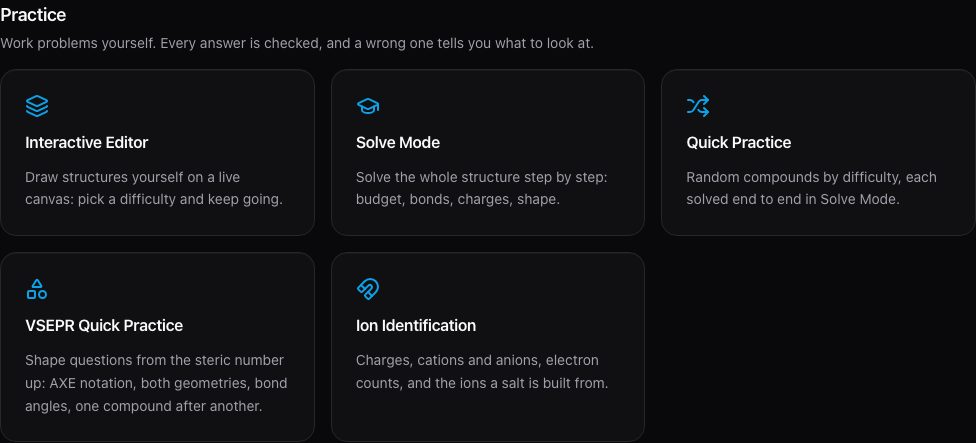
Open Tools and choose from the Practice group.
Quick PracticeA compound at the difficulty you pick, solved end to end, with a hint before the answer.
Solve ModeThe whole exam question one checked step at a time: electron budget, central atom, bonds, charges, then the shape.
Interactive EditorDraw any structure yourself and check it. See Draw a structure below.
VSEPR Quick PracticeSteric number, AXE notation, both geometries and bond angles, in five levels.
Ion IdentificationName the charge, the cations and anions, and the ions a salt is built from.
In Solve Mode, tick only the parts you have been taught.
Lewis structure is always part of it. Formal charge and VSEPR geometry are switches, so you can drill structures alone first. In VSEPR practice you can tick which geometries to include.
If it is differentAssigned work ignores these switches: your teacher decides what an assignment asks.
3
Ask for a hint before you ask for the answer.
Quick Practice and Solve Mode hints respond to your particular mistake and escalate from a nudge to a worked walkthrough, never a straight reveal on the first miss.
4
Know what practice records.
Practice is not marked as an assignment. Signed in, your attempts are recorded on your dashboard, and your teacher's class figures count them unless they pick a single assignment.
Task 4
Draw a structure in the editor
A Lewis structure you built yourself and checked.
1
Open the Interactive Editor and pick a compound.
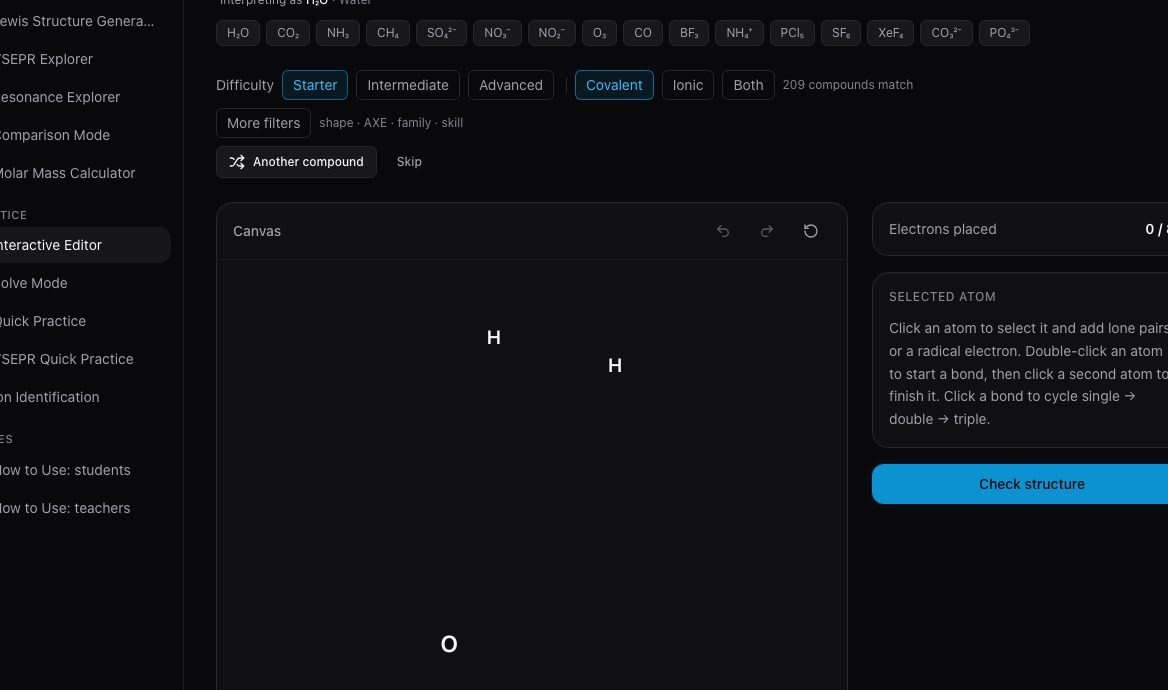
Choose Starter, Intermediate or Advanced and press Another compound, or type a formula and press Generate. The atoms arrive scattered, with no hint which one is central.
The editor with water's three atoms scattered on the canvas: difficulty, Another compound, Undo, Redo, Clear, the electron counter and Check structure.View full sizeOpen the editor
2
Double-click an atom, then click a second atom to bond them.
Click a bond to cycle it single, double, triple and then remove it. Electrons placed counts what you have against the total the molecule needs. From the keyboard, Tab to an atom, press Enter to start a bond and Enter on a second atom to finish it.
3
Select an atom and press Add a lone pair, or Remove a lone pair.
An atom holds up to four lone pairs. At the limit the button greys out but keeps keyboard focus, so you can carry on from where you were.
4
Press Check structure.
It says what is wrong atom by atom, for example that hydrogen can only form one bond, instead of just marking you wrong. Fix one thing and check again.
5
Undo, redo or clear when you change your mind.
Cmd+Z or Ctrl+Z undoes; Cmd+Shift+Z or Ctrl+Y redoes. Clear bonds and lone pairs keeps the atoms where they are. Before your first change Undo and Redo are greyed out: point at one, focus it or tap it and it says why.
Task 5
Look up a compound
A structure, its shape and its numbers, with the reasoning.
1
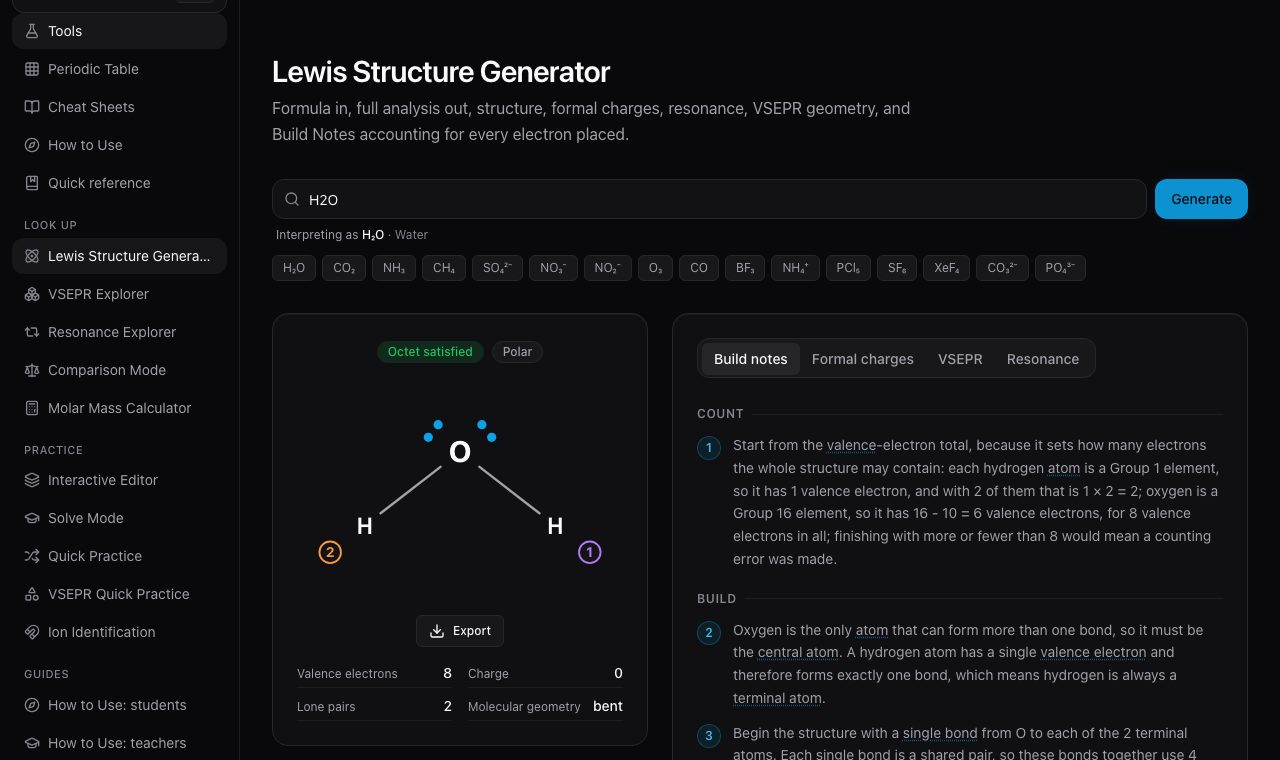
Type a formula or a name into the generator and press Generate.
Use standard notation: H2O, SO4^2- (or SO4 2-), NH4^+. Element symbols are case-sensitive: CO is carbon monoxide, Co is cobalt. The chips under the box load common molecules in one click.
You should seeThe structure with its formal charges, badges for octet exceptions, radicals, resonance and polarity, and tabs for the Build Notes, the formal-charge table, the VSEPR shape and any resonance contributors.
If it is differentIf the generator says the chemistry engine is temporarily unavailable, wait a minute and press Generate again.
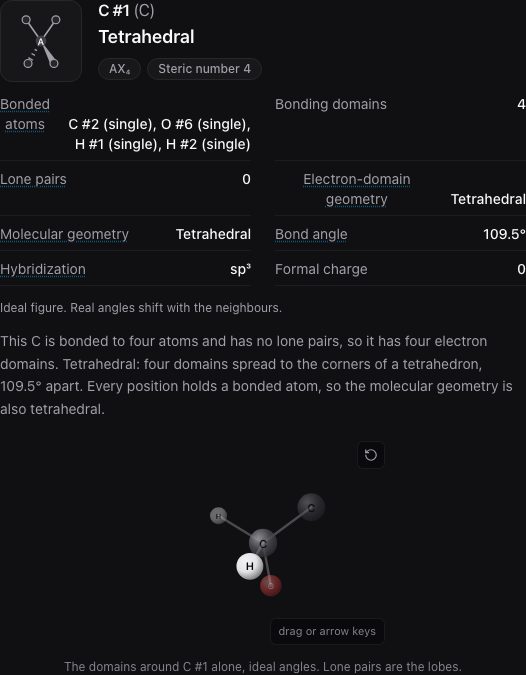
Open the VSEPR tab and choose an atom to see its own shape.
A large molecule has no single shape. Each atom with two or more neighbours gets its own domains, geometry and the reason. Glucose has twelve.
Glucose on the VSEPR tab: choose an atom and its row is marked on the chart.View full size
3
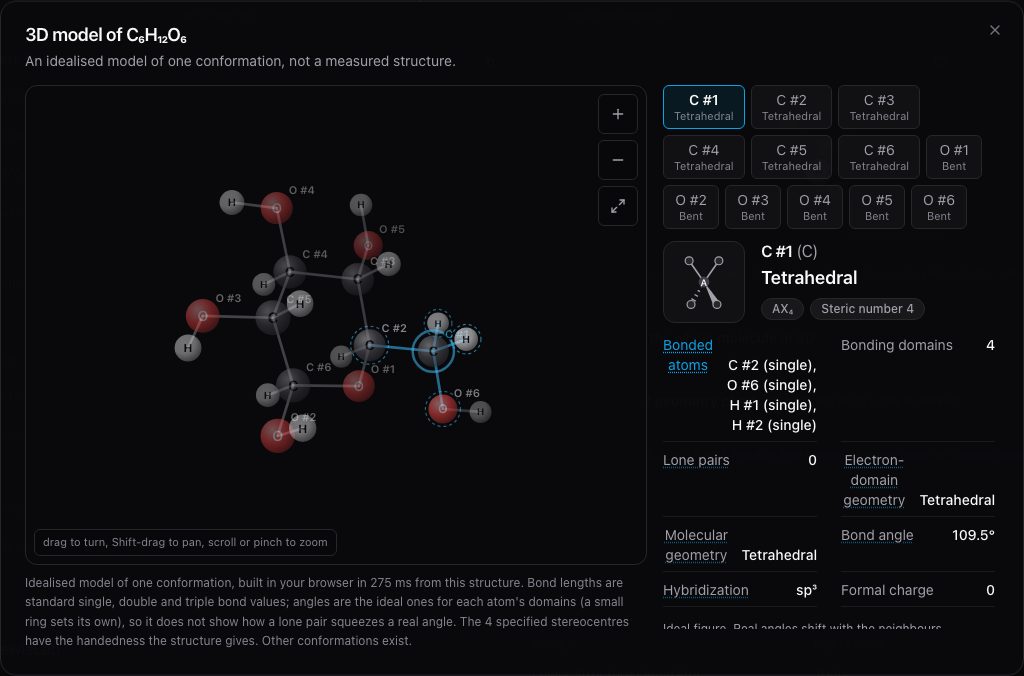
Press Open the whole molecule in 3D and turn it.
Drag to turn it, press Zoom in or scroll to enlarge, and press Fit the whole molecule to start over. The model is idealised: ideal angles, standard bond lengths and one conformation, not a measured structure.
The whole-molecule 3D viewer, with zoom and fit controls.View full size
4
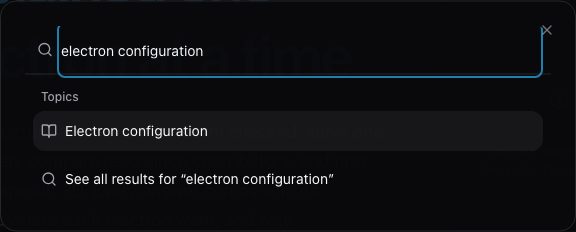
Press Cmd+K or Ctrl+K and type what you are after.
A topic like Pauling scale, a tool like molar mass, or a compound by name or nickname. The best match is first and Enter opens it.
Search, opened from anywhere with Cmd+K or Ctrl+K.View full size
5
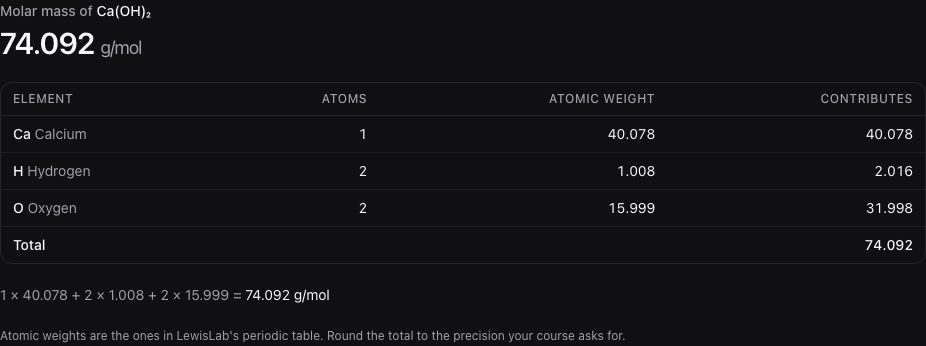
Work out a molar mass with the Molar Mass Calculator.
Type a formula or a compound name, or build the molecule by pressing elements. Each element's atoms, atomic weight and share of the total is shown, so you can check the arithmetic. Press Calculate. Hydrates are not supported, and a charge does not change the mass.
The idea open beside your work, without losing your place.
1
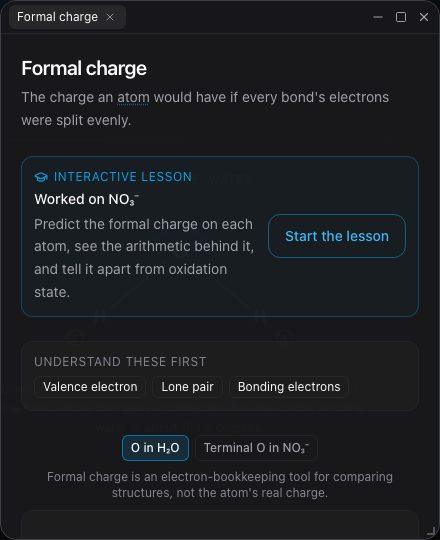
Press any underlined chemistry term.
Words like lone pair, formal charge and hybridization are links wherever they appear. The concept opens beside your work; Connects to leads to related ideas.
A concept window, open beside the page it was opened from.View full size
2
Open a cheat sheet when you want one idea in one sitting.
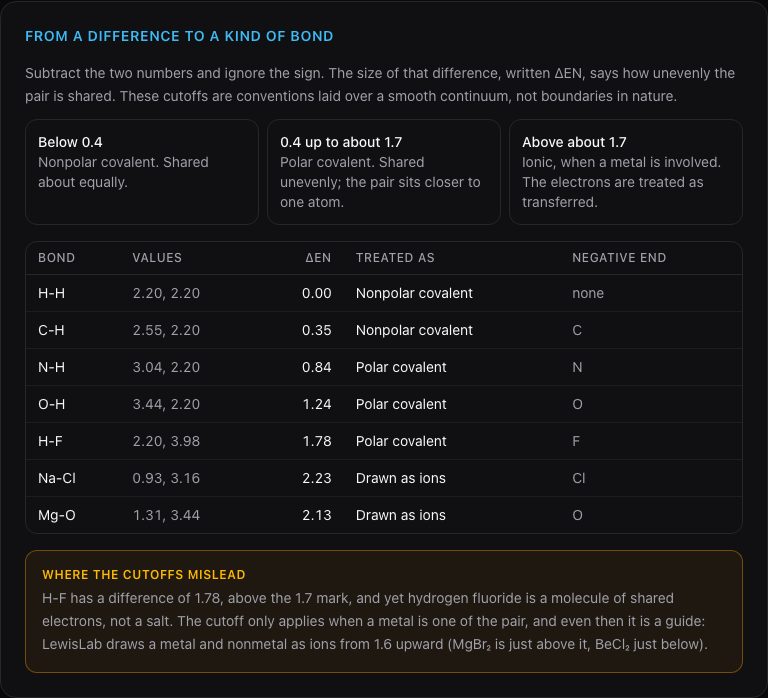
Each sheet ends with a worked practice question. The Electronegativity sheet shows how a difference becomes a nonpolar, polar or ionic bond.
It opens formulas, valence electrons by group, common ions and the full VSEPR table as a panel, so you can look something up without leaving the structure you were reading. Concepts you open appear as tabs: drag to reorder them, or split one out to read two side by side.
4
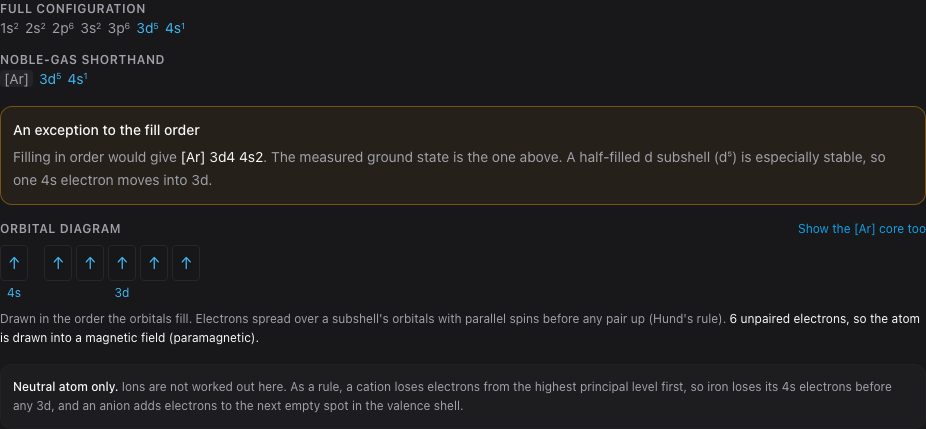
Press an element on the periodic table, then open Electrons.
You get the full and noble-gas configuration, the orbital boxes, and why an exception like chromium is one. Configurations are for the neutral atom only.
You know the shortcuts, where your preferences live and what to try first.
1
Open Settings from the gear in the header.
You can change the display name your class sees, reduce motion, choose a text size, set how often the editor autosaves, download your data as JSON, or delete your account.
2
When a button is greyed out, point at it or focus it.
Submit assignment, and the editor's Undo, Redo and lone-pair buttons, stay in the tab order while they are unavailable, so you do not lose your place. Each says why it cannot be used yet: the page for Submit assignment, a tip for Undo and Redo.
3
If a result looks wrong, check the notation first.
Charges go after a caret (SO4^2-), symbols are case-sensitive, and a name works as well as a formula. If every generator says the chemistry engine is temporarily unavailable, wait a minute and try again.
Keyboard shortcuts
Keys
What they do
Cmd+K or Ctrl+K
Open search: tools, compounds, topics, cheat sheets and guides
Cmd+Z or Ctrl+Z
Undo the last change in the editor
Cmd+Shift+Z or Ctrl+Y
Redo
Tab and Shift+Tab
Move between atoms and bonds on the canvas
Enter or Space
On an atom: start a bond, then finish it on a second atom. On a bond: cycle single, double, triple, remove
Arrow keys
Move the focused atom (hold Shift for bigger steps)